|
|
| Line 75: |
Line 75: |
| *Royal revenants have fairly high defensive bonuses which are offset by a low Defence level. Almost any style can be effective against them. | | *Royal revenants have fairly high defensive bonuses which are offset by a low Defence level. Almost any style can be effective against them. |
| *Appropriate prayer switching, black dragonhide armour and Dinh's bulwark can be used to protect the player by lowering the accuracy of player killers, who bring teleblocks and freezes. | | *Appropriate prayer switching, black dragonhide armour and Dinh's bulwark can be used to protect the player by lowering the accuracy of player killers, who bring teleblocks and freezes. |
| *Alternatively, [[monk's robes]] offer cheap [[prayer bonuses]] at the cost of less defensive and offensive (if using ranged) bonuses.
| |
| *Players can use the ''Toggle'' option on the bracelet of ethereum to make it so dropped ether is automatically added to the bracelet. | | *Players can use the ''Toggle'' option on the bracelet of ethereum to make it so dropped ether is automatically added to the bracelet. |
| <tabber> | | <tabber> |
| Line 82: |
Line 81: |
| {{Recommended equipment | | {{Recommended equipment |
| |style = Ranged | | |style = Ranged |
| |head1 = {{plink|Blessed coif|pic=Ancient coif}} | | |head1 = {{plink2|Slayer helmet (i)}} (on task) |
| |head2 = {{plink|Archer helm}} / {{plink|Spined helm}} | | |head2 = {{plink|Morrigan's coif}} |
| |head3 = {{plink|Snakeskin bandana}} / {{plink|Shayzien helm (5)}} | | |head3 = {{plink|Blessed coif|pic=Ancient coif}} |
| |head4 = {{plink|Coif}}
| | |neck1 = {{plink|Salve amulet(ei)}} |
| |neck1 = {{plink|Amulet of avarice}} <ref | | |neck2 = {{plink|Necklace of anguish}} |
| name = amulet>You will have a [[Skull (status)|Skull]] over your head at all times</ref>
| | |neck3 = {{plink|Amulet of glory}} |
| |neck2 = {{plink|Salve amulet(ei)}}
| | |cape1 = {{plink2|assembler max cape}} |
| |neck3 = {{plink|Necklace of anguish}} | | |cape2 = {{plink|Ava's assembler}} |
| |neck4 = {{plink|Amulet of glory}} | | |cape3 = {{plink|Ava's accumulator}} |
| |neck5 = {{plink|Amulet of power}} / {{plink|Unholy symbol}} | | |cape4 = {{plink|Ranging cape}} |
| |cape1 = {{plink|Ava's assembler}} | | |cape5 = {{plink|Ava's attractor}} |
| |cape2 = {{plink|Ava's accumulator}} | | |body1 = {{plink|Morrigan's leather body}} |
| |cape3 = {{plink|Ranging cape}} | | |body2 = {{plink|Masori body (f)}} |
| |cape4 = {{plink|Ava's attractor}} | | |body3 = {{plink|Black d'hide body}} |
| |body1 = {{plink|Masori body (f)}} | | |legs1 = {{plink|Morrigan's leather chaps}} |
| |body2 = {{plink|Black d'hide body}} | | |legs2 = {{plink|Black d'hide chaps}} |
| |body3 = {{plink|Red d'hide body}} | |
| |body4 = {{plink|Monk's robe top}} | |
| |body5 = {{plink|Blue d'hide body}}
| |
| |legs1 = {{plink|Black d'hide chaps}}
| |
| |legs2 = {{plink|Red d'hide chaps}} | |
| |legs3 = {{plink|Monk's robe}}
| |
| |legs4 = {{plink|Blue d'hide chaps}}
| |
| |weapon1 = {{plink|Webweaver bow}} / {{plink|Craw's bow}} | | |weapon1 = {{plink|Webweaver bow}} / {{plink|Craw's bow}} |
| |weapon2 = {{plink|Toxic blowpipe}} <ref name=ammo>With [[Dragon darts|dragon]], [[Amethyst dart|amethyst]], [[Rune darts|rune]], or [[adamant darts]]</ref> | | |weapon2 = {{plink|Toxic blowpipe}} |
| |weapon3 = {{plink|Magic shortbow (i)}} | | |weapon3 = {{plink|Magic shortbow (i)}} |
| |weapon4 = {{plink|Rune crossbow}} | | |weapon4 = {{plink|Rune crossbow}} |
| |shield1 = None if using [[Webweaver bow|Webweaver]]/[[Craw's bow]], [[toxic blowpipe]], or [[magic shortbow (i)]] | | |shield1 = None if using Webweaver bow/Craw's bow, toxic blowpipe, or magic shortbow (i) |
| |shield2 = {{plink|Book of law}} | | |shield2 = {{plink|Book of law}} |
| |shield3 = {{plink|Unholy book}} | | |shield3 = {{plink|Unholy book}} |
| |shield4 = {{plink|Book of balance}} | | |shield4 = {{plink|Book of balance}} |
| |hands1 = {{plink|Bracelet of ethereum}} | | |hands1 = {{plink|Bracelet of ethereum}} |
| |feet1 = {{plink|Blessed boots|pic=Ancient d'hide boots}} | | |feet1 = {{plink|Pegasian boots}} |
| |feet2 = {{plink|Shayzien boots (5)}} | | |feet2 = {{plink|Blessed boots|pic=Ancient d'hide boots}} |
| |feet3 = {{plink|Snakeskin boots}} | | |ammo1 = {{plink|Holy blessing}} if using Webweaver bow/Craw's bow or toxic blowpipe |
| |feet4 = {{plink|Frog-leather boots}}
| | |ammo2 = {{plink|Amethyst arrows}} |
| |feet5 = {{plink|White boots}}
| | |ammo3 = {{plink|Rune arrows}} |
| |ammo1 = {{plink|Rada's blessing 4}} if using [[Webweaver bow|Webweaver]]/[[Craw's bow]] or [[toxic blowpipe]] | | |ammo4 = {{plink|Diamond bolts (e)}} |
| |ammo2 = {{plink|Amethyst arrows}}<ref name=weapon /> | | |ammo5 = {{plink|Broad bolts}} |
| |ammo3 = {{plink|Rune arrows}}<ref name=weapon /> | | |ring1 = {{plink|Archers ring (i)}} |
| |ammo4 = {{plink|Diamond bolts (e)}} <ref name=weapon>With their respective weapon type</ref> | |
| |ammo5 = {{plink|Broad bolts}} <ref name=weapon /> | |
| |ring1 = {{plink|Explorer's ring 4}} | |
| |ring2 = {{plink|Ring of wealth}}
| |
| }} | | }} |
|
| |
|
| ==Inventory== | | ==Inventory== |
| | yasts |
| {{Inventory|align=right | | {{Inventory|align=right |
| |1=Divine ranging potion(4) | | |1=Divine ranging potion(4) |
| |2=Super restore(4)|3=Super restore(4)|4=Super restore(4) | | |2=Sanfew serum(4)|3=Sanfew serum(4)|4=Sanfew serum(4) |
| |5=Royal seed pod|6=Anglerfish|7=Cooked karambwan|8=Stamina potion(4) | | |5=Sanfew serum(4)|6=Sanfew serum(4)|7=Sanfew serum(4)|8=Sanfew serum(4) |
| |9=Dinh's bulwark|10=Anglerfish|11=Cooked karambwan|12=Anglerfish | | |9=Saradomin brew|10=Saradomin brew|11=Saradomin brew|12=Saradomin brew |
| |13=Phoenix necklace|14=Anglerfish|15=Cooked karambwan|16=Anglerfish | | |13=Saradomin brew|14=Saradomin brew|15=Saradomin brew|16=Saradomin brew |
| |17=Looting bag|18=Anglerfish|19=Cooked karambwan|20=Saradomin brew | | |17=Dinh's bulwark|18=Anglerfish|19=Saradomin brew|20=Saradomin brew |
| |21=|22=Anglerfish|23=Cooked karambwan|24=Saradomin brew | | |21=Dharok's platelegs|22=Anglerfish|23=Anglerfish|24=Looting bag |
| |25=|26=Anglerfish|27=Cooked karambwan|28=Burning amulet}} | | |25=Anglerfish|26=Anglerfish|27=Anglerfish|28=Collector's ring}} |
| <references/>
| |
| {{Clear}} | | {{Clear}} |
| |-| | | |-| |
| Melee = | | Melee = |
| Melee can offer similar dps to ranged setups, but requires additional items risked to maximize damage output. You do gain additional defence and utility from melee gear such as the [[Serpentine helm]] and [[Dragonfire shield]]. | | Melee can offer similar dps to ranged setups, but requires additional items risked to maximize damage output. You do gain additional defence and utility from melee gear such as the Serpentine helm and Dragonfire shield. |
| {{Recommended equipment | | {{Recommended equipment |
| |style = Melee | | |style = Melee |
| Line 189: |
Line 177: |
| {{Inventory|align=right | | {{Inventory|align=right |
| |1=Divine super combat potion(4) | | |1=Divine super combat potion(4) |
| |2=Blighted super restore|3=Blighted super restore|4=Blighted super restore | | |2=Sanfew serum(4)|3=Sanfew serum(4)|4=Sanfew serum(4) |
| |5=Royal seed pod|6=Blighted manta ray|7=Blighted karambwan|8=Stamina potion(4) | | |5=Royal seed pod|6=Blighted manta ray|7=Blighted karambwan|8=Stamina potion(4) |
| |9=Dinh's bulwark|10=Blighted manta ray|11=Blighted karambwan|12=Blighted manta ray | | |9=Dinh's bulwark|10=Blighted manta ray|11=Blighted karambwan|12=Blighted manta ray |
|
|
 |
|
| Released | 2023 (Update unknown) |
|---|
| Donator | No |
|---|
| Combat level | 135 |
|---|
| Size | 5x5 |
|---|
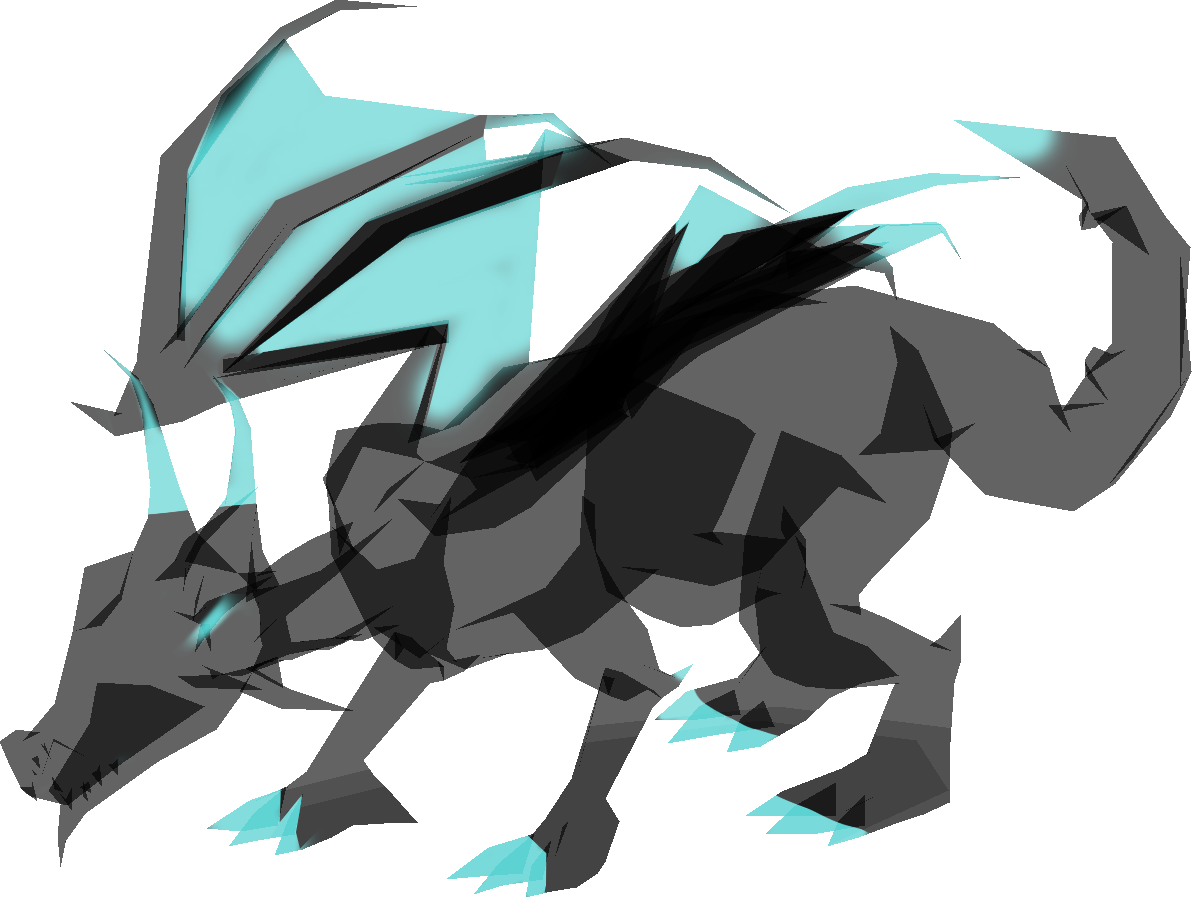
| Examine | The ghost of a dragon slain long ago. |
|---|
|
|
|
| Attribute | Undead, Spectral |
|---|
| Max hit | 30 |
|---|
| Aggressive | Yes |
|---|
| Poisonous | No |
|---|
| Attack style | Slash, Ranged, Magic |
|---|
| Attack speed | 5 ticks (3.0 seconds) |
|---|
| Respawn time | 20 ticks (12 seconds) |
|---|
|
|
|
 |  |  |  |  |  |
|---|
| 155 | 106 | 126 | 87 | 150 | 151 |
|
|
|
| | |  | |  |
|---|
| +72 | +78 | +61 | +35 | +60 | +51 |
|
|
|
 |  |  | | |
|---|
| +201 | +206 | +188 | +101 | +197 |
|
|
|
|
|
| Monster ID | 7940 |
|---|
|
Royal Revenants are the ghostly versions of creatures found in the Royal Donator Zone. They are capable of hitting high and accurately for their combat levels, although most of the damage can be mitigated with a charged bracelet of ethereum. As the Royal Donator Zone location is for royal donators only, all royal revenants are donator-only creatures.
Royal Revenants have a fairly generous drop table, but as they are in the Wilderness, the player is always at risk of getting killed by other players. Due to the royal revenants' lucrativeness, player killers are common. The floor they inhabit are singles-plus combat, where PvP situations take priority over PvM: a player in combat with a revenant can be attacked by another player.
Unique drops from the royal revenants include the Wilderness weapons, a set of weapons that have increased effectiveness against monsters in the Wilderness when charged with revenant ether. They also drop various ancient artefacts, which can be sold to the Emblem Trader wandering within the Revenant Caves for a set amount of Pk Points.
Locations

Fight overview
Royal revenants are capable of using all three forms of combat. Their attacks have very high accuracy against any player not using a bracelet of ethereum regardless of their defensive bonuses. In addition, their attacks change based on the player's defensive stats and protection prayers being used. They are also capable of healing themselves when their health falls below 50%, though this only occurs a limited amount of times. When it heals itself, a lightning strike can be seen.
Being undead, royal revenants are susceptible to the effects of the salve amulet and its enchanted version.
Drops
100% drops
| Item
|
Quantity
|
Drop rate 
|
Price
|
 |
Revenant ether
|
10 - 30
|
Always
|
50 - 150
|
Uniques
| Item
|
Quantity
|
Drop rate
|
Price
|
 |
Viggora's chainmace (u)
|
1
|
1/900
|
100,000
|
 |
Craw's bow (u)
|
1
|
1/900
|
100,000
|
 |
Thammaron's sceptre (u)
|
1
|
1/900
|
30,000
|
 |
Vesta's longsword
|
1
|
1/600
|
100,000
|
 |
Vesta's chainbody
|
1
|
1/600
|
30,000
|
 |
Vesta's plateskirt
|
1
|
1/600
|
40,000
|
 |
Morrigan's coif
|
1
|
1/600
|
20,000
|
 |
Morrigan's leather body
|
1
|
1/600
|
25,000
|
 |
Morrigan's leather chaps
|
1
|
1/600
|
25,000
|
 |
Statius's full helm
|
1
|
1/600
|
3,500
|
 |
Statius's platebody
|
1
|
1/600
|
8,500
|
 |
Statius's platelegs
|
1
|
1/600
|
8,500
|
 |
Statius's warhammer
|
1
|
1/600
|
15,000
|
 |
Zuriel's hood
|
1
|
1/600
|
3,500
|
 |
Zuriel's robe top
|
1
|
1/600
|
8,500
|
 |
Zuriel's robe bottom
|
1
|
1/600
|
8,500
|
 |
Zuriel's staff
|
1
|
1/600
|
10,000
|
Ancient artifacts
| Item
|
Quantity
|
Drop rate
|
Price
|
 |
Ancient relic
|
1
|
1/3000
|
64,000
|
 |
Ancient effigy
|
1
|
1/1800
|
32,000
|
 |
Ancient medallion
|
1
|
1/900
|
16,000
|
 |
Ancient statuette
|
1
|
1/450
|
8,000
|
 |
Ancient totem
|
1
|
1/240
|
4,000
|
 |
Ancient emblem
|
1
|
1/90
|
2,000
|
Weapons, armor and resources
| Item
|
Quantity
|
Drop rate
|
Price
|
 |
Dragon chainbody
|
1 - 20 (Noted)
|
1/18
|
50 - 1,000
|
 |
Dragon platelegs
|
1 - 20 (Noted)
|
1/18
|
50 - 1,000
|
 |
Bracelet of ethereum (uncharged)
|
1
|
1/15
|
1,000
|
 |
Revenant cave teleport
|
1 - 5
|
1/9
|
100 - 500
|
 |
Morrigan's javelin
|
2 - 7
|
1/6
|
120 - 420
|
 |
Morrigan's throwing axe
|
2 - 7
|
1/6
|
160 - 560
|
 |
Pk Point
|
1 - 200
|
1/6
|
1 - 200
|
 |
Super combat potion(4)
|
1 - 50 (Noted)
|
1/3
|
5 - 250
|
 |
Anglerfish
|
1 - 50 (Noted)
|
1/3
|
0 - 0
|
 |
Cooked karambwan
|
1 - 50 (Noted)
|
1/3
|
0 - 0
|
Tertiary
| Item
|
Quantity
|
Drop rate
|
Price
|
 |
Pet Royal Revenant dragon
|
1
|
1/3000
|
N/A
|
 |
Clue scroll (master)
|
1
|
1/1711
|
N/A
|
 |
Clue scroll (elite)
|
1
|
1/2306
|
N/A
|
 |
Clue scroll (hard)
|
1
|
1/1302
|
N/A
|
 |
Clue scroll (medium)
|
1
|
1/744
|
N/A
|
 |
Clue scroll (easy)
|
1
|
1/446
|
N/A
|
Equipment
As royal revenants have very high accuracy, the bracelet of ethereum is highly recommended when battling them.
- Royal revenants are considered undead creatures, so the salve amulet and variants will work on them.
- Royal revenants have fairly high defensive bonuses which are offset by a low Defence level. Almost any style can be effective against them.
- Appropriate prayer switching, black dragonhide armour and Dinh's bulwark can be used to protect the player by lowering the accuracy of player killers, who bring teleblocks and freezes.
- Players can use the Toggle option on the bracelet of ethereum to make it so dropped ether is automatically added to the bracelet.
Ranged can usually offer better dps against revenants with less gear used, and d'hide conveniently adds ranged accuracy while giving magic defence. However, you will be more vulnerable to incoming melee and ranged attacks from pkers without a shield.
Inventory
yasts
Melee can offer similar dps to ranged setups, but requires additional items risked to maximize damage output. You do gain additional defence and utility from melee gear such as the Serpentine helm and Dragonfire shield.
Inventory
Regardless of your inventory setup, you should have a teleportation item capable of bringing you to safety at or below level 30 Wilderness, such as a royal seed pod or charged dragonstone jewellery, in addition to the following:

