| Slot | Item (most effective → least effective) | |||
|---|---|---|---|---|
| N/A | ||||
| N/A | N/A | |||
| N/A | N/A | |||
| See Ranged | N/A | N/A | N/A | |
| N/A | N/A | |||
| N/A | N/A | |||
| N/A | ||||
Great Olm
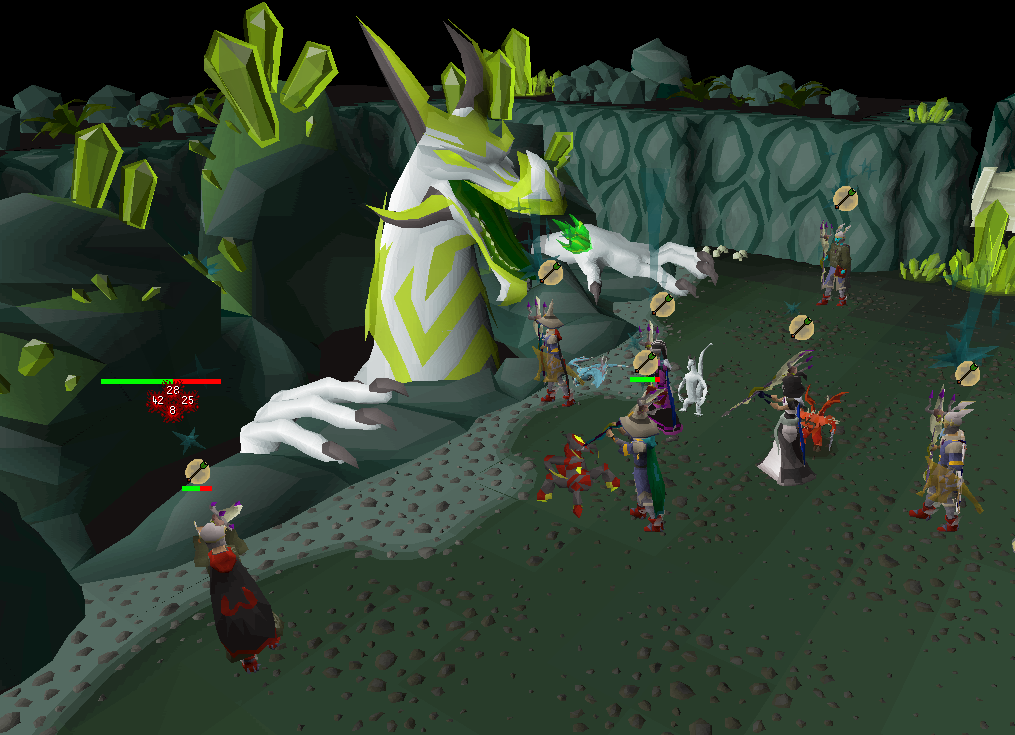
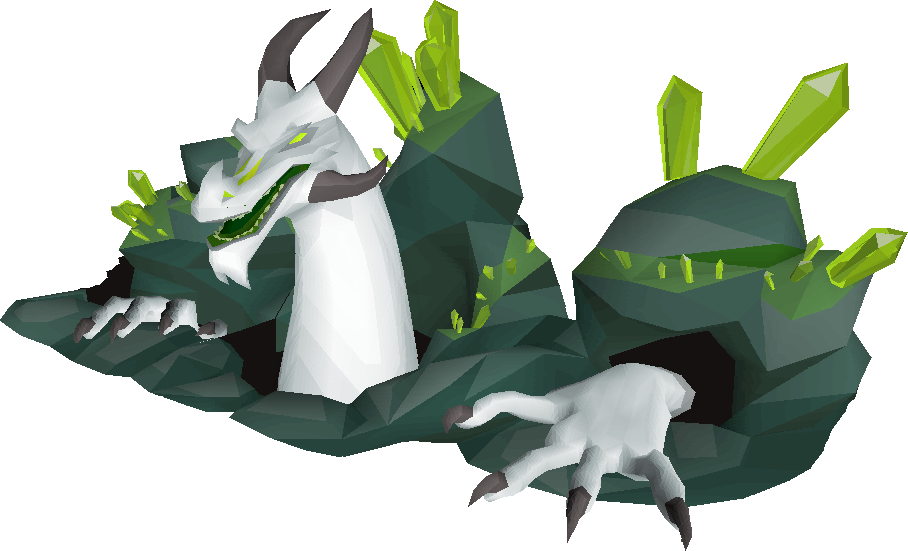
The Great Olm (referred to as the Guardian in the Deep by Xeric's followers) is the final boss in the Chambers of Xeric raid. A large, blind, white salamander, it is one of Xeric's greatest possessions.
Mechanics
Attacks
- Standard attacks: Olm has two standard attacks: Magic and Ranged. The magic attacks are large green orbs, while the ranged attacks are smaller chunks of crystal. Both deal the same amount of damage. Prayer reduces the damage by roughly 75-80%.
- Spheres: Olm randomly picks a sphere (red, green or purple) and sends it at the player. If not blocked, the player will be damaged approximately 50% of their current Hitpoints. If a protection prayer was used when the sphere was launched, it is disabled and the player's Prayer is reduced by 50%. To block the attack, pray accordingly before and as the sphere hits you:
- Red (sphere of aggression): Protect from Melee
- Green (sphere of accuracy and dexterity): Protect from Missiles
- Purple (sphere of magical power): Protect from Magic
During phases 1-3, Olm also has access to these specific attacks:
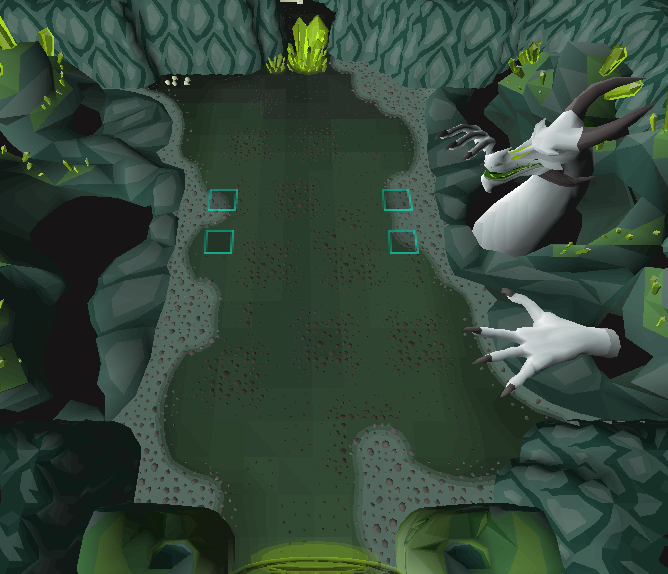
- Crystal Burst: Olm throws a crystal seedling under every player in the chamber. A few seconds later, the crystals burst and shove the player to a nearby tile if they are on top of them for heavy damage. The left hand will briefly show a crystal icon when using this attack.
- Lightning: Shoots out lightning running north and/or south of the chamber. Getting hit by a bolt of lightning electrocutes the player, disabling their overhead prayers, dealing moderate damage, and binding them. The left hand will briefly show a lightning bolt when using this attack.
- Swap: Olm will perform a teleport attack that deals damage the further the player is from the target. The left hand briefly shows a swirl when using this attack. If alone, Olm will pick a random tile anywhere in the chamber; if there are more players in the room, Olm will evenly distribute the amount of teleports. If there is an odd-numbered amount of people inside, then those people will not be subjected to the attack.
Olm also has phase-unique attacks which can replace one of the auto-attacks in his rotation:
- Acid:
- Acid Spray: Olm spits out several pools of acid around the chamber. Standing on top of an acid pool deals 3-6 damage per tick and inflicts poison starting at 2 damage.
- Acid Drip: Olm covers a player in acid, causing them to generate acid pools under them. Standing still will deal damage and moving will generate more pools, though it is not much of a deal in small groups. The pools function the same way as the pools in the spray attack.

- Flame:
- Deep Burn: Olm shoots out a green fireball at a player, causing them to yell "Burn with me!". The targeted player takes 5 damage every few ticks, dropping stats by 2 each time this occurs for six hits. If it spreads to other players, the timer resets and newly infected players will initially yell "I will burn with you."
- Fire Wall: Olm shoots out two walls of fire at a player to trap them. If the player is on a tile that would be occupied by the fire wall, they will leap out and take 8-10 damage in the process. After the walls are placed, players in the tiles between the two walls will take 50-65 damage in 5 seconds if they do not escape. Any water, such as water spells, ice spells, Humidify or a filled watering can will suffice in dousing a segment of flame.
- Crystal:
- Falling Crystals: Olm lets out a cry, targeting one player with a red aura. 11 spiked crystals fall from above, dealing up to 15-20 damage to anyone in the targeted tile.
- Crystal Bombs: Olm shoots out a crystal bomb (up to three at most; two for smaller groups). The bomb explodes after being deployed for several seconds, covering a radius of four tiles. The minimum amount of damage dealt is 15, increasing by an additional 15 damage for every tile closer to it.
There are also attacks applied during other segments of the fight:
- Autoheal: During the first three phases, any attacks aimed at the head are completely healed after several ticks have passed. In the third phase, the left arm also gets a variant of this ability where any attacks that deal damage will cause it to heal instead. When this is performed the left hand shows an infinity symbol.
- Falling Crystals: During phase transitions and the last phase, Olm causes chunks of crystal to fall from above. These crystals have a 3x3 AoE; getting directly hit (underneath the shadow) by them will deal 16-25 damage, while getting indirectly hit (one tile from centre) deals 10-16 damage. One crystal will always be aimed at a random player in the chamber. A shadow will indicate where the crystal will land.
- Life Siphon: In the last phase, Olm will shoot out two blue projectiles which generate a shield when it hits the ground. Several ticks later, Olm will damage anyone not on the targeted tiles for moderate damage, healing himself for five times the total amount of damage it deals to the team.
Fight overview


Olm has at least four phases, with an additional phase for every 8 players in the raid. Unlike the other bosses in the room, once the player enters his chamber, it is a fight to the death. In each phase except the penultimate and final ones, Olm will focus on a specific set of abilities referred to as powers.
Like other bosses in the chambers, many of Olm's stats scale between its claws and head depending on the stats and amount of players in the raid, despite him having a pre-determined combat level. If stat draining attacks — such as dragon warhammer special attack — are used, they only affect the part of him that was hit. His stats also reset when a new phase starts.
Olm attacks with ranged and magic, the former consisting of a chunk of crystal and latter green-coloured dragonfire. There is a 1/5 chance the Great Olm will switch between these attack styles each time its head performs an attack. Olm has three attack zones to choose from; left, middle and right. He prioritises the zone with the most amount of players. If no players are in that zone, he will swerve his head accordingly and skip an attack in its attack rotation. If a player is in his attack zone but Olm swerves his head regardless, no attacks are skipped.
Olm's attack rotation consists of the following below. Phase-specific attacks are incorporated into the attack pattern as an auto-attack and alternate between the available pool:
- 2 auto-attacks
- Crystal Burst
- 2 auto-attacks
- Lightning
- 2 auto-attacks
- Teleport
- Loops from above
There is a 1/3 the Great Olm will carry out a phase-specific attack in lieu of an auto-attack (provided they are not on cooldown), increasing to a 1/2 chance during the final phase of the encounter. When this roll succeeds, the Great Olm will consequently try to avoid picking any of the available phase-specific attacks it has already used before.
In order to progress to the next phase, both of Olm's hands must be disabled. The Olm's left hand will clench if it takes a particularly heavy hit, equal to at least 1/20 of its base health. Olm's head can be attacked at any phase, although he will automatically recover any damage taken shortly afterwards in all but the final phase. When both hands are disabled, Olm will retreat underground and shake the area with AoE falling crystals before reappearing on the other side with a new power. During the penultimate phase, the left hand gains a damage to health ability indicated with an infinity sign on it. In this phase, both of Olm's hands must be disabled within a specific time frame or it will recover back at full health. All powers are available to Olm during this phase, and it is indicated with Olm's head glowing.
Once both hands are disabled, Olm remains on the spot and attempts a final stand. AoE crystals will continually fall from above until Olm is killed. As with the previous phase, he has access to all of its powers.
Equipment
Note: The equipment layouts below is for melee only, with magic and ranged switches in the player's inventory due to all three combat styles being required.
| Slot | Item (most effective → least effective) | |||
|---|---|---|---|---|
| Any melee helmet | ||||
| N/A | N/A | |||
| N/A | N/A | |||
| N/A | ||||
| N/A | ||||
| N/A | ||||
| N/A | N/A | N/A | ||
| See Melee | N/A | N/A | N/A | |
| N/A | N/A | N/A | ||
| Slot | Item (most effective → least effective) | |||
|---|---|---|---|---|
| Any melee helmet | N/A | N/A | ||
| N/A | N/A | |||
| N/A | N/A | N/A | ||
| N/A | ||||
| N/A | ||||
| N/A | ||||
| See Ranged | N/A | N/A | N/A | |
| N/A | N/A | |||
| Camp/Takeoff melee boots | N/A | N/A | N/A | |
| See Melee | N/A | N/A | N/A | |
Setups
Potions are free at the start of every raid.
| Minimum | Medium | Max | ||||||||||||||||||||||||||||||||||||||||||||||||||||||||||||||||||||||||||||||||||||
|---|---|---|---|---|---|---|---|---|---|---|---|---|---|---|---|---|---|---|---|---|---|---|---|---|---|---|---|---|---|---|---|---|---|---|---|---|---|---|---|---|---|---|---|---|---|---|---|---|---|---|---|---|---|---|---|---|---|---|---|---|---|---|---|---|---|---|---|---|---|---|---|---|---|---|---|---|---|---|---|---|---|---|---|---|---|---|
|
|
| |||||||||||||||||||||||||||||||||||||||||||||||||||||||||||||||||||||||||||||||||||||
- ↑ Energy drains 25% slower with max cape.
- ↑ Xeric's aid (+)(4), Revitalisation (+)(4) and Prayer enhance (+)(4) can be spawned, which saves time.
- ↑ The Bandos Godsword special attack drains more defence than the Dragon Warhammer's special attack after two hammers or more have successfully landed.
- ↑ Additional items brought to speed up the raid include: Zaryte crossbow + Ruby bolts (e), Voidwaker, Dragon claws.
Chambers of Xeric Drop Rates
- There are two drop tables: UNIQUE and DEFAULT.
- For every 3,000 Points you receive, you have a +1% (changes based on Donator Rank) chance of landing on the UNIQUE drop table.
Meaning if you solo a normal raid without dying you would receive 32,000-ish points (7.5 per hit) or a 10% chance of landing on the UNIQUE drop table. Donators do get a drop boost here. - Twisted Bow, Rigour & Augury prayers have a drop rate of 1/512 from the UNIQUE table.
This means that a solo-olm kill without dying would give you a drop rate of 1/5120 for each of those items (as a normal player).
As an example, if you were a Legendary donator and solo-killed the olm without dying, your Twisted Bow drop rate would be 512 * (100/(1.4 * 10)) = 1/3657 - instead of 1/5120 as a non-donator. - You will always receive a drop from the DEFAULT drop table as long as you have over 3,000 Points, every 300 points above that gives you a +1% chance of receiving another DEFAULT drop from the table.
- The Olmlet pet is only rolled if you land on a purple chest (unique drop), and then the drop rate is 1/65, so in theory, it's roughly 1/650 raids.
- The Metamorphic Dust is only dropped if you finish a raid in Challenge mode, the drop rate is always 1/400 there (can be obtained without a purple chest).
| Wilderness bosses | |||
|---|---|---|---|
| Wilderness monsters | |||
| World bosses | |||
