| Slot | Item (most effective → least effective) | ||||
|---|---|---|---|---|---|
| N/A | |||||
| N/A | |||||
| N/A | N/A | N/A | |||
| N/A | N/A | ||||
| N/A | N/A | ||||
| None with Sanguine / Holy scythe of vitur | |||||
| N/A | N/A | N/A | N/A | ||
| N/A | N/A | ||||
| N/A | N/A | ||||
| N/A | N/A | ||||
TzTok-Jad: Difference between revisions
m (→Equipment) |
|||
| (27 intermediate revisions by 3 users not shown) | |||
| Line 1: | Line 1: | ||
{{ | {{Gear}} | ||
{{Infobox Monster | {{Infobox Monster | ||
|name = TzTok-Jad | |name = TzTok-Jad | ||
| Line 10: | Line 9: | ||
|size = 5 | |size = 5 | ||
|examine = This is going to hurt... | |examine = This is going to hurt... | ||
|max hit = | |max hit = 35 (Melee), 35 (Ranged), 35 (Magic) | ||
|aggressive = Yes | |aggressive = Yes | ||
|poisonous = No | |poisonous = No | ||
| Line 37: | Line 36: | ||
|id = 3127 | |id = 3127 | ||
}} | }} | ||
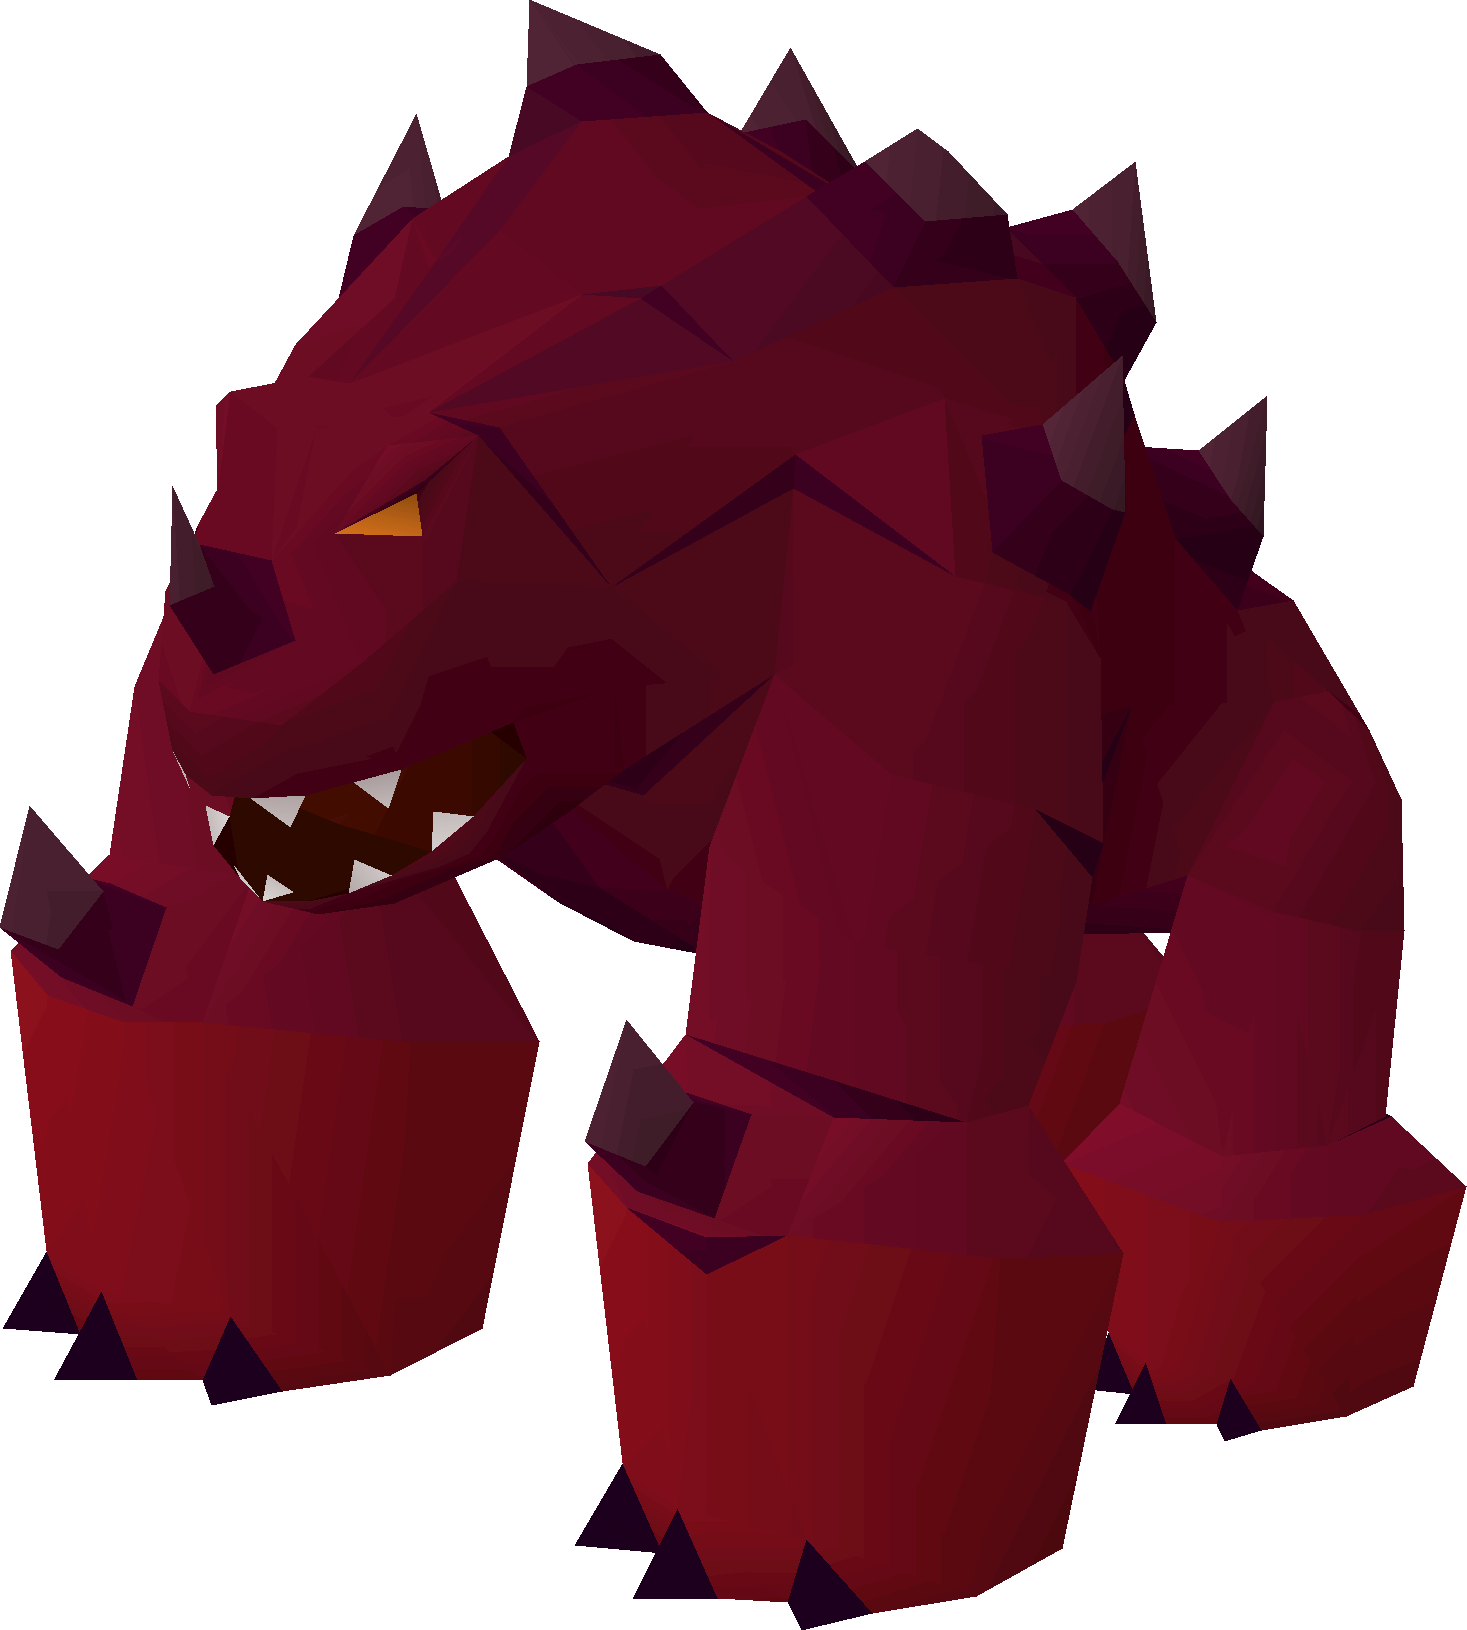
'''Jad''' spawns every hour at :00 ([[Skotizo]] at :30). It uses 3 attack styles, Melee, Magic and Range. It will always spawn in multi zones and will attack all players in range and everyone can attack him. | '''Jad''' spawns every hour at :00 ([[Skotizo]] at :30) in the [[Wilderness]]. It uses 3 attack styles, Melee, Magic and Range. It will always spawn in multi zones and will attack all players in range and everyone can attack him. | ||
To get there type ::jad in game. | |||
==Locations== | ==Locations== | ||
{ | {{LocationHead}} | ||
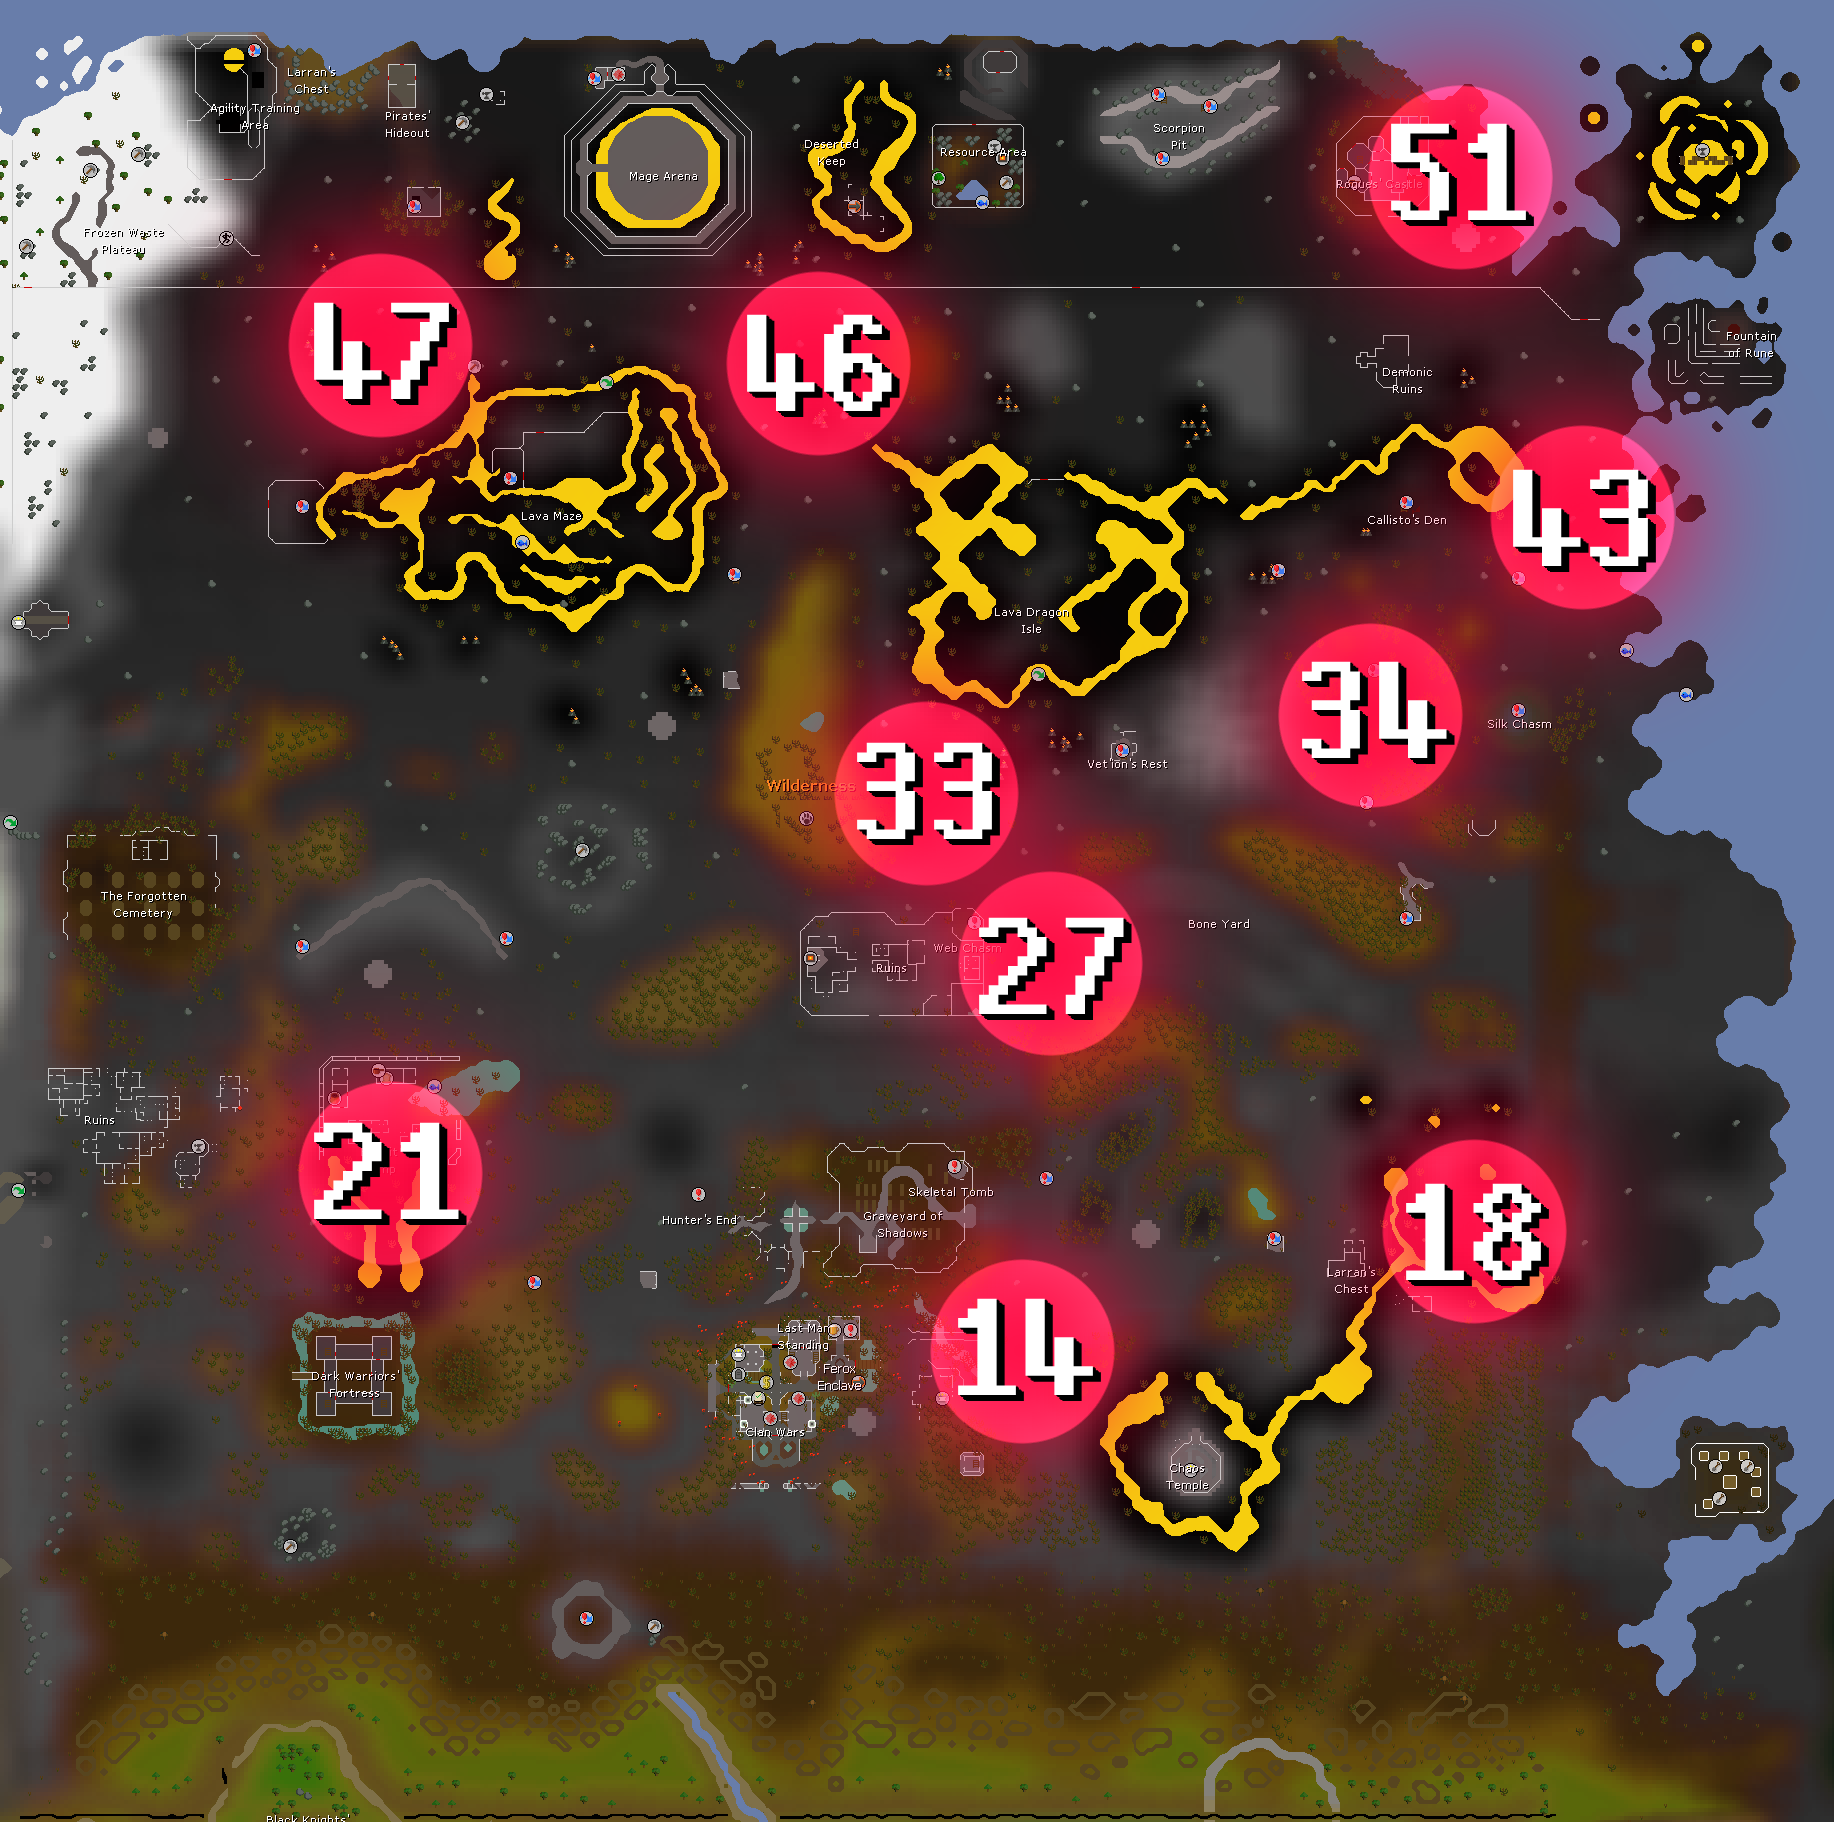
| All over the [[Wilderness]] | | All over the [[Wilderness]] | ||
|<center>702</center> | |<center>702</center> | ||
| | | | ||
|{{multi}} | |||
|} | |} | ||
[[File:jadspawns.png| | [[File:jadspawns.png|370px|Jad spawns]] | ||
==Fight overview== | ==Fight overview== | ||
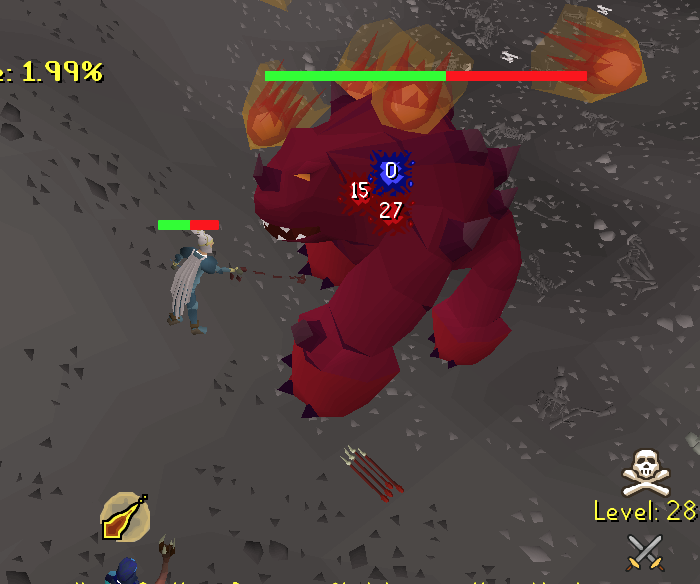
[[File: | [[File:pvm6.png|thumb|A player fighting Jad.]] | ||
Jadspawns | |||
===Attacks=== | |||
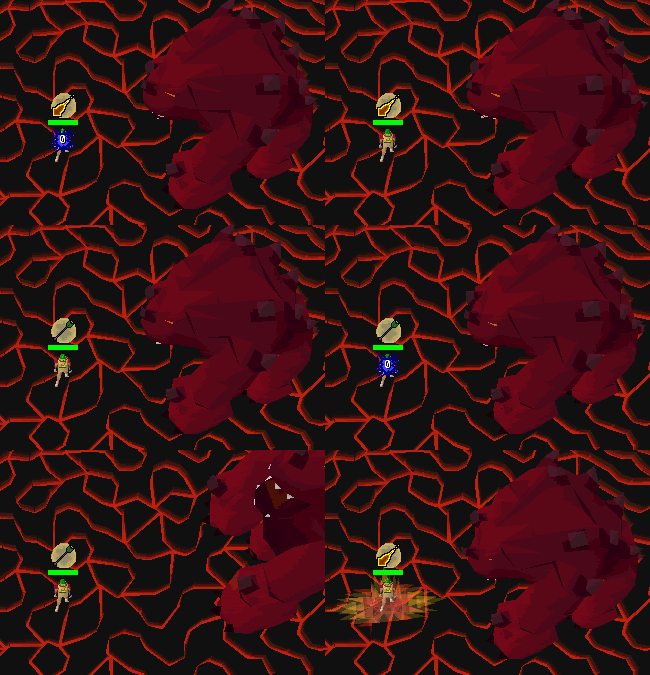
== | [[File:TzTok-Jad Animations.gif|frame|right|Jad slams his feet to the ground for Ranged, and he rears up dangling his feet for Magic.]] | ||
Survival depends on watching TzTok-Jad's movements - an emote precedes the attack, telling the player which protection prayer to use. | |||
*'''Melee:''' TzTok-Jad slams his fist into the player. This is the fastest attack, but if the player stays at a distance, they should not encounter it. '''Please note that this attack has no warning for you to pray for.''' | |||
*'''Magic:''' TzTok-Jad will rear up, standing up straight and will begin to breathe fire after about half a second. You can hear him inhale/growl loudly, (the sound of Retribution's effect activating) while rearing up and before he actually attacks, so listen for it. Protect from Magic needs to be activated while he's rearing up as after he begins to breathe fire it will be too late, and you will be hit. | |||
*'''Ranged:''' TzTok-Jad slams his front legs onto the ground, and large cracks appear in the floor at his feet - the player must turn on their Prayer now. Next, a boulder will fall down on the player. The sound from this attack only occurs '''AFTER''' the hit has been registered, meaning you must have your prayer on beforehand, it is recommended you have this prayer on when the wave starts, as you may not be able to see Jad before it is too late. (If you hear the magic sound you can always swap prayers.) | |||
Although somewhat slow, all of these attacks can deal enough damage in a single blow to kill even the most powerful of players if not guarded by use of the correct protection prayer. TzTok-Jad has a maximum hit of 97 with all three combat styles; due to its combat stats of 640 Attack, 480 Magic and 960 Ranged, they are extremely accurate too. | |||
==Equipment== | ==Equipment== | ||
'''{{Colour|red|Warning}}: This boss is always in multi combat and is actively contested by clans, beware of player-killers! Do not bring items you are not willing to lose.''' | |||
<tabber> | <tabber> | ||
|-|Melee= | |-|Melee= | ||
{{Recommended equipment | {{Recommended equipment | ||
|style = Melee | |style = Melee | ||
|head1 = {{plink| | |head1 = {{plink|Serpentine helm}} | ||
|head2 = {{plink| | |head2 = {{plink|Obsidian helmet}} | ||
|head3 = | |head3 = {{plink|Void melee helm}} (if using void) | ||
|head4 = {{plink|Helm of neitiznot}} | |||
| | |neck1 = {{plink|Amulet of rancour}} | ||
| | |neck2 = {{plink|Amulet of torture}} | ||
| | |neck3 = {{plink|Amulet of fury}} | ||
| | |neck4 = {{plink|Amulet of glory}} | ||
| | |||
|cape1 = {{plink|Infernal cape}} /<br/>{{plink|TokHaar-kal}} | |cape1 = {{plink|Infernal cape}} /<br/>{{plink|TokHaar-kal}} | ||
|cape2 = {{plink|Fire | |cape2 = {{plink|Fire cape}} /<br/>{{plink|Donator Cape}} | ||
|ammo1 = {{plink|Holy blessing}} | |||
|body1 = {{plink|Fighter torso}} | |||
|body2 = {{plink|Obsidian platebody}} | |||
|ammo1 = {{plink| | |body3 = {{plink|Elite void top}} /<br/>{{plink|Void knight top}} (if using void) | ||
|legs1 = {{plink|Bandos tassets}} | |||
|body1 = {{plink| | |legs2 = {{plink|Obsidian platelegs}} | ||
|body2 = {{plink| | |legs3 = {{plink|Elite void robe}} / <br/> {{plink|Void knight robe}} (if using void) | ||
|body3 = | |weapon1 = {{plink2|Sanguine scythe of vitur}} /<br/>{{plink2|Holy scythe of vitur}} | ||
|weapon2 = {{plink|Ursine chainmace}} | |||
|legs1 | |||
| | |||
| | |||
| | |||
| | |||
|weapon3 = {{plink|Osmumten's fang}} | |weapon3 = {{plink|Osmumten's fang}} | ||
|weapon4 = {{plink| | |weapon4 = {{plink|Blade of saeldor}} /<br/>{{plink|Ghrazi rapier}} /<br/>{{plink|Inquisitor's mace}} | ||
|weapon5 = {{plink|Abyssal tentacle}} | |weapon5 = {{plink|Abyssal tentacle}} | ||
|shield1 = | |shield1 = None with Sanguine / Holy scythe of vitur | ||
|shield2 = {{plink| | |shield2 = {{plink|Avernic defender}} | ||
|shield3 = {{plink| | |shield3 = {{plink|Dragonfire shield}} | ||
|shield4 = {{plink| | |shield4 = {{plink|Dragon defender}} | ||
|shield5 = {{plink| | |shield5 = {{plink|Rune defender}} | ||
|hands1 = {{plink|Ferocious gloves}} | |hands1 = {{plink|Ferocious gloves}} | ||
|hands2 ={{plink|Barrows gloves}} | |hands2 ={{plink|Barrows gloves}} | ||
|hands3 = {{plink|Void knight gloves}} (if using void) | |hands3 = {{plink|Void knight gloves}} (if using void) | ||
|feet1 = {{plink|Primordial boots}} | |feet1 = {{plink|Primordial boots}} | ||
|feet2 = {{plink|Dragon boots | |feet2 = {{plink|Dragon boots}} | ||
|feet3 | |feet3 = {{plink|Rune boots}} | ||
|ring1 = {{plink|Ultor ring}} | |ring1 = {{plink|Ultor ring}} | ||
|ring2 | |ring2 = {{plink|Berserker ring (i)}} | ||
|ring3 = {{plink|Brimstone ring}} /<br/>{{plink|Berserker ring}} | |||
| | |||
}} | }} | ||
|-|Ranged= | |-|Ranged= | ||
Ranging is recommended over melee | Ranging is recommended over melee if you dont have Sanguine / Holy scythe of vitur | ||
{{Recommended equipment | {{Recommended equipment | ||
|style = Ranged | |style = Ranged | ||
|head1 = {{plink| | |head1 = {{plink|Void ranger helm}} (if using void) | ||
|head2 = {{plink|Armadyl helmet}} | |head2 = {{plink|Armadyl helmet}} | ||
|head3 = {{plink| | |head3 = {{plink|Karil's coif}} | ||
|head4 = {{plink|Blessed coif|pic=Ancient coif}} | |head4 = {{plink|Blessed coif|pic=Ancient coif}} | ||
|neck1 = {{plink|Necklace of anguish}} | |neck1 = {{plink|Necklace of anguish}} | ||
|neck2 = {{plink|Amulet of fury}} | |neck2 = {{plink|Amulet of fury}} | ||
|neck3 = {{plink|Amulet of glory}} | |neck3 = {{plink|Amulet of glory}} | ||
|cape1 = {{plink|Blessed dizana's quiver}} | |||
|cape2 = {{plink|Ava's assembler}} | |||
|cape1 = {{plink| | |cape3 = {{plink|Ava's accumulator}} | ||
|cape2 = {{plink|Ava's | |||
|cape3 = {{plink|Ava's | |body1 = {{plink|Elite void top}} / <br/>{{plink|Void knight top}} (if using void) | ||
| | |||
|body2 = {{plink|Armadyl chestplate}} | |body2 = {{plink|Armadyl chestplate}} | ||
|body3 = {{plink| | |body3 = {{plink|Karil's leathertop}} | ||
|body4 = {{plink|Blessed body|pic=Ancient | |body4 = {{plink|Blessed body|pic=Ancient d'hide body}} | ||
| | |legs1 = {{plink|Elite void robe}} / <br/>{{plink|Void knight robe}} (if using void) | ||
|legs2 = {{plink|Armadyl chainskirt}} | |legs2 = {{plink|Armadyl chainskirt}} | ||
|legs3 = {{plink| | |legs3 = {{plink|Karil's leatherskirt}} | ||
|legs4 = {{plink|Blessed chaps|pic=Ancient | |legs4 = {{plink|Blessed chaps|pic=Ancient chaps}} | ||
|weapon1 = {{plink|Webweaver bow}} | |||
|weapon1 = {{plink| | |weapon2 = {{plink|Twisted bow}} | ||
|weapon2 = {{plink| | |weapon3 = {{plink|Zaryte crossbow}} | ||
|weapon3 = {{plink| | |||
|weapon4 = {{plink|Armadyl crossbow}} | |weapon4 = {{plink|Armadyl crossbow}} | ||
|shield1 = None if using Twisted bow / Webweaver bow | |||
|shield1 = None if using Twisted bow/ | |||
|shield2 = {{plink|Twisted buckler}} | |shield2 = {{plink|Twisted buckler}} | ||
|shield3 = {{plink|Odium ward}} | |shield3 = {{plink|Odium ward}} | ||
|shield4 = {{plink|Book of law}} | |shield4 = {{plink|Book of law}} | ||
|hands1 = {{plink|Void knight gloves}} (if using void) | |||
|hands1 = {{plink| | |||
|hands2 = {{plink|Barrows gloves}} | |hands2 = {{plink|Barrows gloves}} | ||
|feet1 = {{plink|Pegasian boots}} | |feet1 = {{plink|Pegasian boots}} | ||
|feet2 = {{plink|Ranger boots}} | |feet2 = {{plink|Ranger boots}} | ||
|feet3 = {{plink|Blessed boots|pic=Ancient d'hide boots}} | |feet3 = {{plink|Blessed boots|pic=Ancient d'hide boots}} | ||
|ring1 = {{plink|Venator ring}} | |ring1 = {{plink|Venator ring}} | ||
|ring2 = {{plink|Archers ring (i)}} | |ring2 = {{plink|Archers ring (i)}} | ||
|ring3 = {{plink|Brimstone ring}} | |ring3 = {{plink|Brimstone ring}} / {{plink|Archers ring}} | ||
|ammo1 = {{plink|Dragon arrows}} | |||
|ammo2 = {{plink|Ruby dragon bolts (e)}} | |||
|ammo1 = {{plink|Dragon | |ammo3 = {{plink|Ruby bolts (e)}} | ||
|ammo2 = {{plink| | |||
|ammo3 = {{plink| | |||
}} | }} | ||
</tabber> | </tabber> | ||
==Drops== | |||
{{JadDrops}} | |||
---- | |||
{{Bosses}} | |||
Latest revision as of 00:46, 2 May 2025
Jad spawns every hour at :00 (Skotizo at :30) in the Wilderness. It uses 3 attack styles, Melee, Magic and Range. It will always spawn in multi zones and will attack all players in range and everyone can attack him.
To get there type ::jad in game.
Locations
| LocationLocation of TzTok-Jad | LevelCombat level of TzTok-Jad | DonatorDonator rank required | Multi/SingleMulti/Single/Singles-plus combat area |
|---|---|---|---|
| All over the Wilderness |
Fight overview

Jadspawns
Attacks

Survival depends on watching TzTok-Jad's movements - an emote precedes the attack, telling the player which protection prayer to use.
- Melee: TzTok-Jad slams his fist into the player. This is the fastest attack, but if the player stays at a distance, they should not encounter it. Please note that this attack has no warning for you to pray for.
- Magic: TzTok-Jad will rear up, standing up straight and will begin to breathe fire after about half a second. You can hear him inhale/growl loudly, (the sound of Retribution's effect activating) while rearing up and before he actually attacks, so listen for it. Protect from Magic needs to be activated while he's rearing up as after he begins to breathe fire it will be too late, and you will be hit.
- Ranged: TzTok-Jad slams his front legs onto the ground, and large cracks appear in the floor at his feet - the player must turn on their Prayer now. Next, a boulder will fall down on the player. The sound from this attack only occurs AFTER the hit has been registered, meaning you must have your prayer on beforehand, it is recommended you have this prayer on when the wave starts, as you may not be able to see Jad before it is too late. (If you hear the magic sound you can always swap prayers.)
Although somewhat slow, all of these attacks can deal enough damage in a single blow to kill even the most powerful of players if not guarded by use of the correct protection prayer. TzTok-Jad has a maximum hit of 97 with all three combat styles; due to its combat stats of 640 Attack, 480 Magic and 960 Ranged, they are extremely accurate too.
Equipment
Warning: This boss is always in multi combat and is actively contested by clans, beware of player-killers! Do not bring items you are not willing to lose.
Ranging is recommended over melee if you dont have Sanguine / Holy scythe of vitur
| Slot | Item (most effective → least effective) | |||
|---|---|---|---|---|
| N/A | ||||
| N/A | ||||
| None if using Twisted bow / Webweaver bow | ||||
| N/A | ||||
| N/A | N/A | |||
| N/A | ||||
| N/A | ||||
Drops
Uniques
| Item | Quantity | Drop rate | Price | ||||||
|---|---|---|---|---|---|---|---|---|---|
| Dexterous prayer scroll (Rigour) | 1 | 250,000 | |||||||
| Jad plush | 1 | 250,000 | |||||||
| Jad slippers | 1 | 100,000 | |||||||
| Demonic relic | 1 | 64,000 | |||||||
Weapons
| Item | Quantity | Drop rate | Price | |
|---|---|---|---|---|
| Serpentine helm (uncharged) | 2 | 10,000 | ||
| Staff of light | 2 | 10,000 | ||
| Armadyl crossbow | 2 | 10,000 | ||
| Abyssal dagger (p++) | 2 | 5,000 | ||
| Malediction ward | 2 | 5,000 | ||
| Odium ward | 2 | 5,000 | ||
| Dragon crossbow | 2 | 5,000 | ||
| Bandos godsword | 2 | 5,000 | ||
| Saradomin godsword | 2 | 5,000 | ||
| Zamorak godsword | 2 | 5,000 | ||
Tertiary
| Item | Quantity | Drop rate | Price | ||||||
|---|---|---|---|---|---|---|---|---|---|
| Tzrek-jad | 1 | N/A | |||||||
| Clue scroll (master) | 1 | N/A | |||||||
| Clue scroll (elite) | 1 | N/A | |||||||
| Clue scroll (hard) | 1 | N/A | |||||||
| Clue scroll (medium) | 1 | N/A | |||||||
| Clue scroll (easy) | 1 | N/A | |||||||
| Wilderness bosses | |||
|---|---|---|---|
| Wilderness monsters | |||
| World bosses | |||

